
(Step 1.0) Shoot your footage.
Now we need some footage. I am just using a clip of Pexels for this example. But here are some things to consider if you’re shooting your own footage.
(1) Don’t be too Lit. The biggest thing that will hinder your shot is lighting. An overcast day will work the best. But you can get away with direct sunlight if you blend the snow assets more.
(2) Snow-ibility. This is a word that I am coining. Snow-ibility. Basically what things in your scene will make it hard to lay down snow? For example, do you have a lot of moving objects such as trees, or plants that will break the illusion? These are things to keep in mind. As you can tell from this clip I’ve chosen a flat, non-moving environment, a busy street on an overcast day.
(3) Record your life. If you're watching this tutorial, that means you're past the stage in a filmmaker's life where you just shoot something and hope for the best. We want to record everything about our setup. Camera settings (Aperture, Focal distance, Color Temp, Color Profile), Rough scale information, (Distance between subject and camera, Camera and ground etc…).
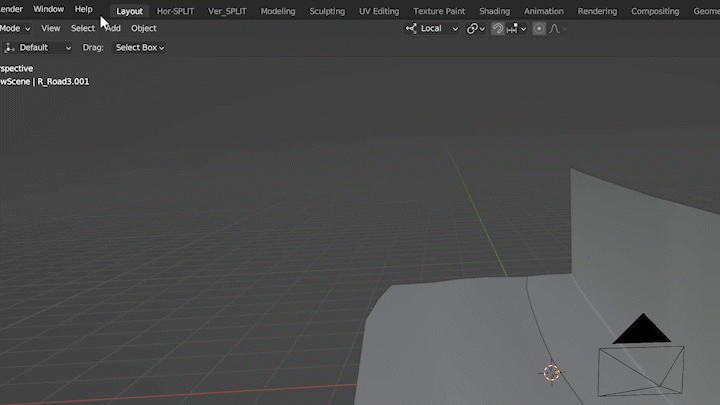
(Step 2.0) Scene Setup and Tracking.
Next we need to motion track. If your shot is a still shot then you’ll have to try and follow the FSpy method or just move the camera into position based on those measurement data we made. [On Screen: Links to FSpy method in description].
As mentioned previously on this channel, Ian Hubert’s motion tracking tutorial is all you’ll really need for motion tracking. But here is a quick reminder.
First go into the motion tracking tab, Input your footage and make sure to click prefetch and set scene frames. Next click detect features and add in some points we’re going to brute force this. Go to the first frame, and track forward. Then go to the last frame, Detect features. Press A. and track backwards. Then go to the middle, detect features, Press A and track forward and backwards. Overkill.
We can then go into the solve tab and start to clean up or data. Keep going until you have a value below 1. If this method doesn’t work or you're not getting the result you want you may need to add in manual tracks. [On Screen: To do this Ctrl + Left Click, then select that track and track forward or backwards.]
Click set up tracking scene. You can either select three points on the floor and click the floor to roughly align the video or move the camera manually to try and match the original position.
The last and possibly the most time consuming part is creating a model of the scene. Subdivide, extrude and move your plane to match the scene. I had to extrude walls, add in rough highspots to the floor and move the edges.
(Step 3.0) Model snow.
All the resources you’ll need to make the snow can be found for free. Woohoo! (1) A Snow texture material (Free materials on Poly Haven), (2) a free overcast HDRI (HDRI Haven), (3) and a displacement map (the one’s I’ve made will be in the description).
3.1 Displacement Maps.
Let’s make some custom Displacement maps. You’ll need a photo editing software like Photoshop. You’ll also need some paint brush textures. [On screen: These ones are free with Photoshop, but I’ll link some other one’s in the description.]
Create Displacement. Create a new layer and start painting using the brushes Since this is for a street I wanted to make the snow build up in patches around the edges. [On Screen: Think about what spots would melt away first.]
Making Displacement Repatable. Now that we have our image we need to make it repeatable. Duplicate the layer as a backup. Then press Ctrl + E. To collapse the layer. We can then Make two more duplicates and create a layer mask and paint away the edges. We can then move that layer to the top and continue to feather it in with the layer mask. Basically we’ve just taken one edge, cut it up and merged it back at the top. This will make the texture continue in Blender.
Making Water Layer. Thirdly we can create a “water” or shadow layer. Save the file, duplicate the current layer or group and press Ctrl + E to merge the layers together. We can then go to Filter > Maximum, Go back to Filter > Blur > Gaussian Blur.
Exporting Displacement. Lastly, we can export these files. It’s important to export these files as a TIFF or EXR file, not a PNG. This way we retain as much information to use to displace our material.
3.2 Material & UV
For the snow material, first add in an image texture and load in our displacement map.
We can add in a horizontal split viewport and go into the UV editor. With the object selected in the viewport go into the edit mode. Back in our new UV editor window we can move the position of our points to better match the pavement. Since our texture is looping we can also extend past the edge of our displacement map.
Next we can add in a Mix Shader and a Transparent material. Mixing between both with our displacement map. Also add in an invert node if need be.
On a first material press, Ctrl + Shift + T to import our downloaded snow material. This will set up our texture for us. [On Screen: You may just need to reduce the scale].
Now for some depth.
First, Add in a displacement node. Plug in our displacement map to the height, change the mid level to 0 and adjust the Scale. Make sure you go to the settings tab of the material and change it to Bump + Displacement.
Second, Add in a subdivision modifier to the plane. If you don’t see the Adaptive Subdivision checkbox this is because you don’t have Cycles Experimental setting enabled. This setting determines how many slices the Subdivision modifier will do.
Quick thing to note, You’ll see below the dicing scale two values, the render value and viewport value. When working in blender you’ll see the viewport value. If you're wondering why your renders are taking a lot longer to compute it’s probably because it’s slicing the layer using the render value. This is a setting you’ll have to play around with. [On screen: I found … and … to be the best setting for render].
Now we can create the ‘Car Shadow Maps’ or cutouts for any obstructions to our layer. IE: a Car or post or something. In our material add in an image texture node and create a new image. Now this can be where it becomes a little tricky to follow along, so follow me closely. To avoid any weird mismatches between our texture map and UV map, like seen here. We need to add a new UV map to the same object.
To do this go to, Data > UV Maps > Create new UV Map. We also need to tell the image texture node in our material to use this new UV Map. To do this add in a UV Map node in the material editor, connect it to our Image texture and select our new UV Map.
In one of our viewports we can then go into the texture paint tab and begin painting. [On Screen: Making sure the last thing we clicked on in the material editor is the image texture]. Paint away at the spots where our obstacles are, this may take some back and forth to get right. [On Screen: Use the mix setting, switching between black and white with the hotkey ‘X’]
We can use a mix color node to mix between our two ‘Car shadow textures’, [On Screen: Use Add blending mode with a factor of 1]. Lastly use a Mix color node again to subtract the Car shadow maps from our displacement map. [On Screen: Use the Car shadow maps as the factor. Input our displacement into slot A and change slot B to a black material.]
Bam! That’s the basic procedure for creating snow on a surface. You may also want to create some discoloration in the snow by using another mix color node in between the diffuse input of our snow texture. [On Screen: I just used the same diffuse snow texture + a curves node to create discoloration].
(Step 4.0) Falling Snow.
4.1 Pre-Made Assets.
Now there are two ways to do this. The easy way is to get some snow assets online, track them into your footage [On Screen Text: Link to Tracking examples in Description. We’ll also cover tracking later in Video], and then change the blending mode to screen. This works great but if you want some snow interaction here’s what to do.
4.2 Blender Particle Animation.
What we want to do is. First make sure to save a copy of your project.
First add in a plane and adjust it into position. Add in a sphere and make sure the poly count is low, this will be our Snowflake. With the plane selected add in a new Particle Emitter. Set the render setting to Object and choose our snowflake.
Next we can change some settings. Lower the Mass of the object. Scroll down to Field weights and turn down both the Gravity and All settings. This makes the snow fall slower.
We now need to make some collision objects. Find the scene models you’ve made, copy them and put them in a new folder. Add in a Collision object. Here we can adjust some settings, Firstly up the Stickiness, Damping and friction to a value of 1. We don’t want our snow balls bouncing back up.
We may also need to move our Camera track forwards, so that the snow is not starting to fall. To do this go to our Camera, Look in Constraints and here we will see our object constraint. Click constraint to F-Curve, this will add keyframe Data to our camera. From here we can extend our scene and move our camera keyframes forward. ]
Add in a new material to our Snowflake sphere. In the material editor add in a Layer weight Node, a transparent material, mix shader, and a curves modifier. We can then mix between two textures; our white material and transparent material, using the Layer weight Node + curves to guid how transparent we want the edges to be.
Now all that’s left is to play around with all the settings we mentioned. Also make sure to change the collision objects visibility to Holdout, and render that bad boy as an EXR.
(Step 5.0) Compositing.
5.1 Node Layering.
Open up Davinci Resolve. In the timeline we can now drag and drop all our EXR renders. [On Screen: Make sure to set the render frame rate] Our final Snow render, Water Shadow render, and falling snow render. For all of these renders we’re going to follow the same procedure.
From our base clip, create a new fusion clip. First create a merge node. Make sure the base clip is in the background (Yellow input) and the new layer is in the foreground (green input). We can also add in a Divide and multiply node, this will protect our edges when we do color grading. Add in a Curves node in between these two. Unclick alpha and adjust the whites and blacks to match the shot. Do this for all the three render layers.
5.2 Masking.
We’ll have to do some masking. I’ve made a tutorial on how to mask out objects in Davinci resolve. Make sure to check out that tutorial. One masked, add two more merge nodes. The first will be used to cut out a mask by setting the blending mode to Mask. We can then merge our new fill’s back into the sequence of layers, like so.
5.3 Final touches.
From here it’s all fine tuning. Try your best to mix in those layers. Add some blur if need be, and wolla your final result!!
Subscribe more content.